Steps to Work to Tickets
After setting up the TeamDynamix ticket, If you see any “Unassigned” ticket under “WS Tickets” section like below screenshot

You will receive tickets in email as well.
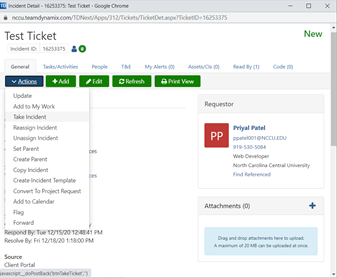
Click on the Ticket Title to open the ticket in this case it is “Test Ticket”. The ticket will look like the screenshot below. The status will be “New” for all new tickets as you can see in the top-right corner with the green label.

If you feel like you will be able to work on this ticket then you can take this ticket.
Steps to Take ticket:
Click on “Action” dropdown
Click on “Take Incident”
Then a ticket will be assigned to you.
You can see the Feed like this after you take the Incident.

After you take the ticket you will need to update the status of the ticket. To update the status of the ticket you will need to click on “Action” then “Update” and change status from new to In Process

If ticket status is “New” then there are more chances to get violated. Make sure you change the status first from “New” to “In Process”. You will get 3 days to complete if the ticket is in process.
Enter Time Type, for tickets it will be Ticket Time. Enter hours that you worked on the ticket. In the above case I took 6 minutes to review the ticket then I added 0.10 Hours. If you take 60 minutes, then you can add 1 hour.
Notify Requester that you have taken that ticket and are working on this ticket. As you can see in the Comments section. Under Notify section, make sure you pick Requester's name, Damond Nollan, Priyal Patel, and Katherine Farley, and Hit Save.
In case if you don’t have time to work on the ticket on the same day or time then you can change the status from “In Process” to “On Hold” and enter Off Hold time.
Notify the Requestor again for verification after you complete your part of work.
Create Subtasks
Make sure you add subtask for the ticket to estimate the hours
To create subtask:
Click on the “Add” button, then click task.

The “New Ticket Task” window will pop up. Enter Title, Start Date and Due Date, Estimated Hours, Responsible Person, and Description.
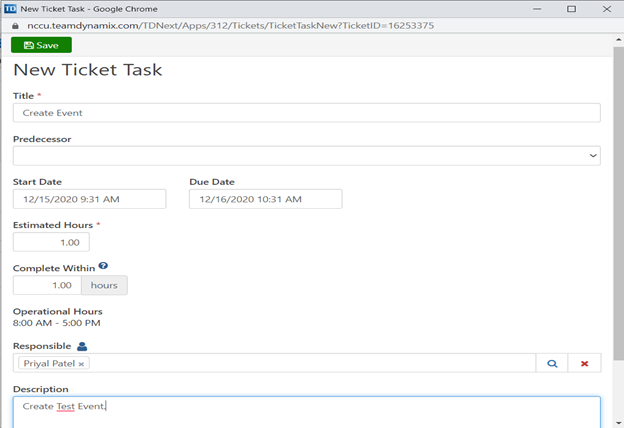
In Most of the cases you will create sub-tasks for yourself to estimate hours. In some of the cases for example if you need some help to create a graphic for events, announcements, or webpage then you will need someone’s help then you can create a subtask for someone else.
Subtasks are also useful to extend the Due Dates.
You will see subtasks in the ticket under “Current Activities”.
After you complete your work you can close that subtask by clicking on “Mark Complete” or change the percentage of complete by going into the subtask.
You are responsible to close the ticket after you complete the work. You can close the ticket by changing the status to “Closed” and notify Requestor on the ticket.
TeamDynamix “Time & Expenses”
Once you submit your time for any of the ticket or project tasks, you will see your submitted time under the “Time & Expenses” tab. It will look like the below screenshot:
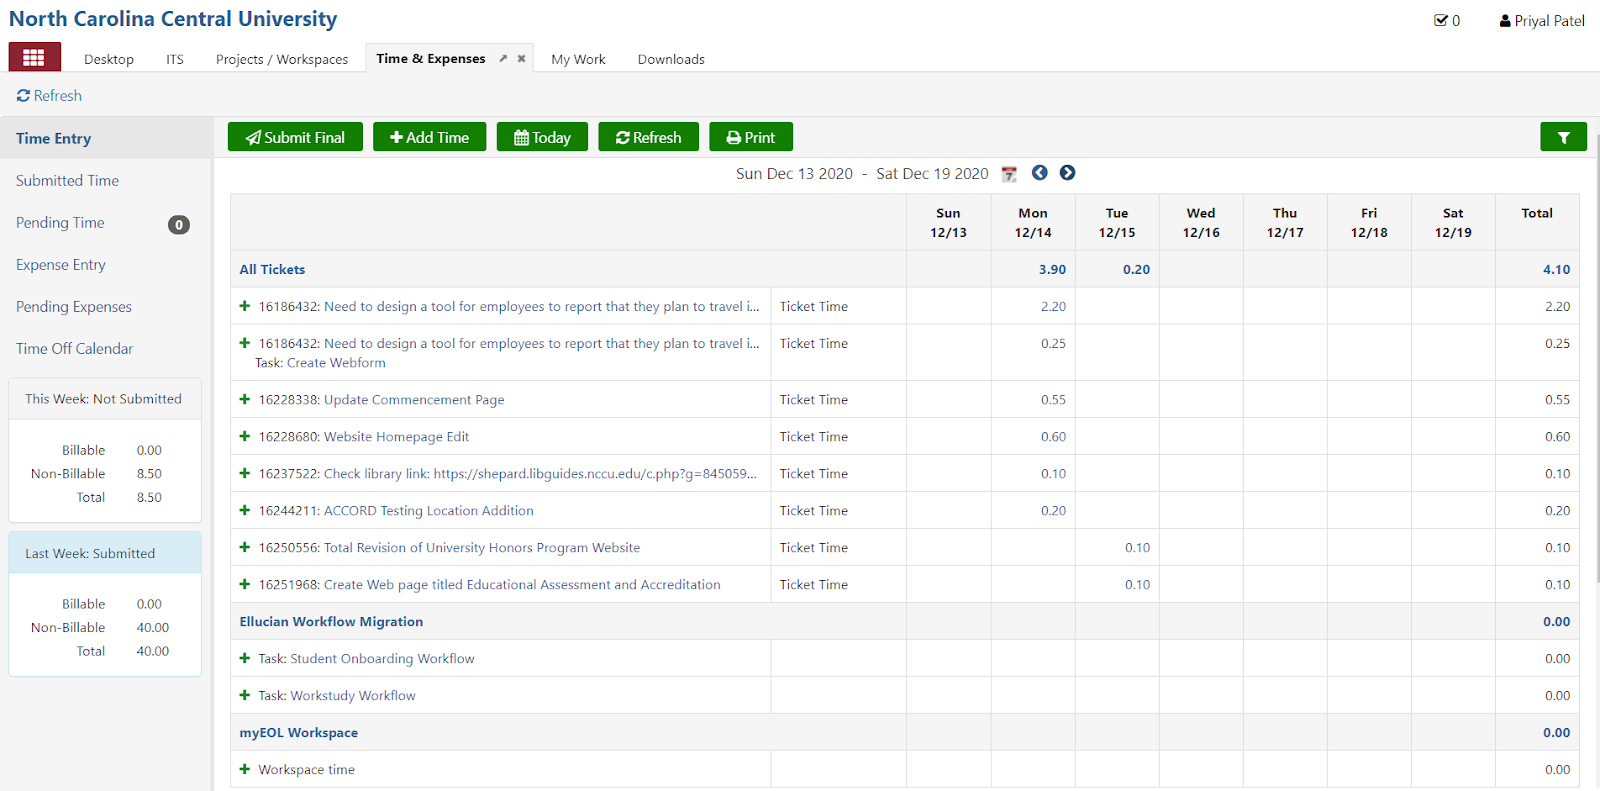
At the end of the week, you will need to submit your timesheet. If you are working 10 hours a week, you will need to submit 10 hours at the end of the week.